Sharing inboxes
Organize test emails you send from different environments into separate inboxes. Find out how to manage access to your Mailtrap messages, and what you can do with inboxes shared with you by others.
How to organize your test data in Mailtrap
To let you quickly find your data, switch between different tasks, and share your testing results with colleagues or clients, Mailtrap automatically organizes your messages into different inboxes (these are grouped into projects).
Usually, Mailtrap users tend to create separate inboxes for different environments: development, test, or staging. Each inbox is defined by SMTP credentials (your username and password). If necessary, you can reset them at any time.
How to share your inboxes with others
For effortless collaboration with your colleagues or customers, you can share data of your choice with them: separate inboxes or whole projects (to learn how to share projects, check this article - Sharing projects).
There are two ways to share your inbox:
- Invite users directly to inbox
- Share inbox via User Management
Note that it doesn’t matter which option you choose. New users will be visible in the Inbox Team Members tab and in the User Management list. But to share an inbox, you need to be one of the following:
- Inbox, project, or account admin
- Account owner
Also, sharing options are available starting from the Team plan. The feature is called User Management and includes the Team Members section for your Projects and Inboxes. Each subscription plan offers a specific number of unique email addresses (users) that can be invited to your account.
You can invite anyone, even if they don't have a Mailtrap account yet. To share an inbox, you need to know the email address of the person who you want to make a Team member.
- Click the gear icon on the far right of the inbox you'd like to share.
- Go to the Access Rights tab.
- Enter the email address of your team member.
- Choose the invitee’s permission level (e.g. Inbox Viewer or Admin)
 Once you click the Add button, the email invitation will be sent to the specified email address. The recipient should accept the email invitation.
But if a person is already in your account the inbox will immediately become visible to them.
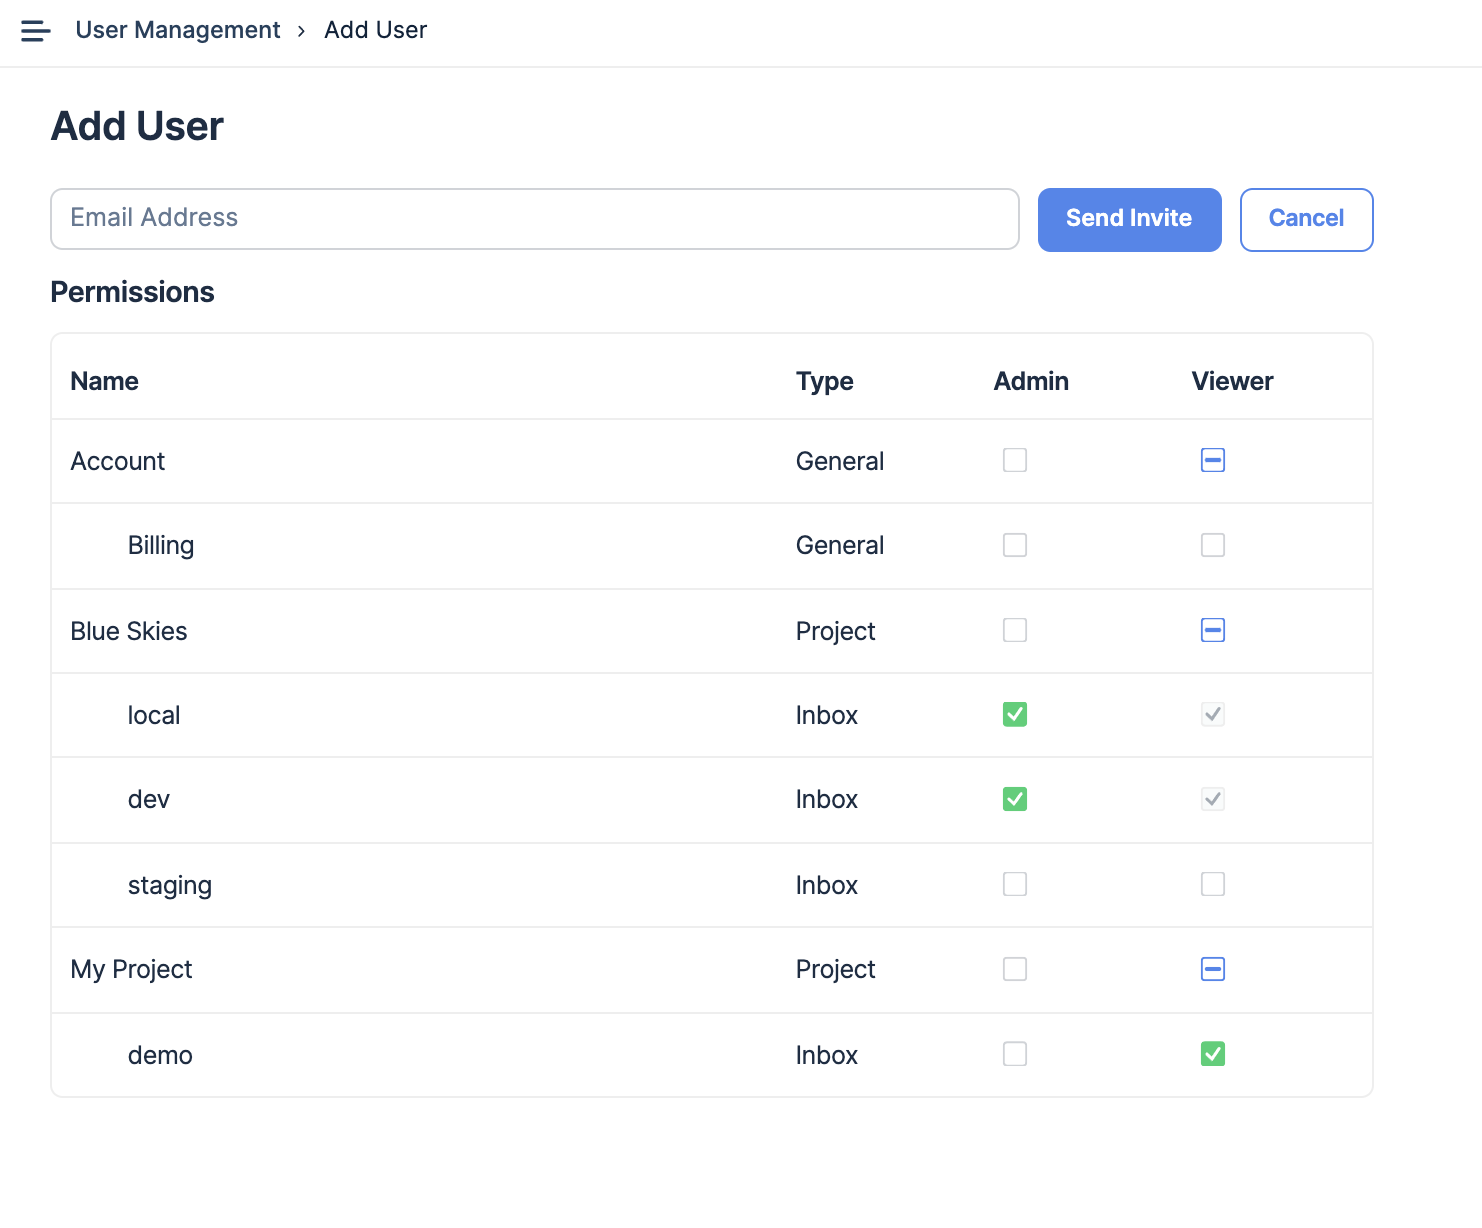
Alternatively, you can use the
User Management feature. Select it and click the
Add Member button. Type the user’s email address and tick the box under the permission level for an inbox you’d like to share.
And yes, you can share multiple inboxes at the same time. To finalize sharing, hit Send Invite and you’re good to go.
If recipients don't have a Mailtrap account, they will be asked to create a free one. They get a registration invite where they proceed to the sign-up page and fill out a form using their credentials.
After the registration, these users get access to the inbox.
Inboxes shared with you by others
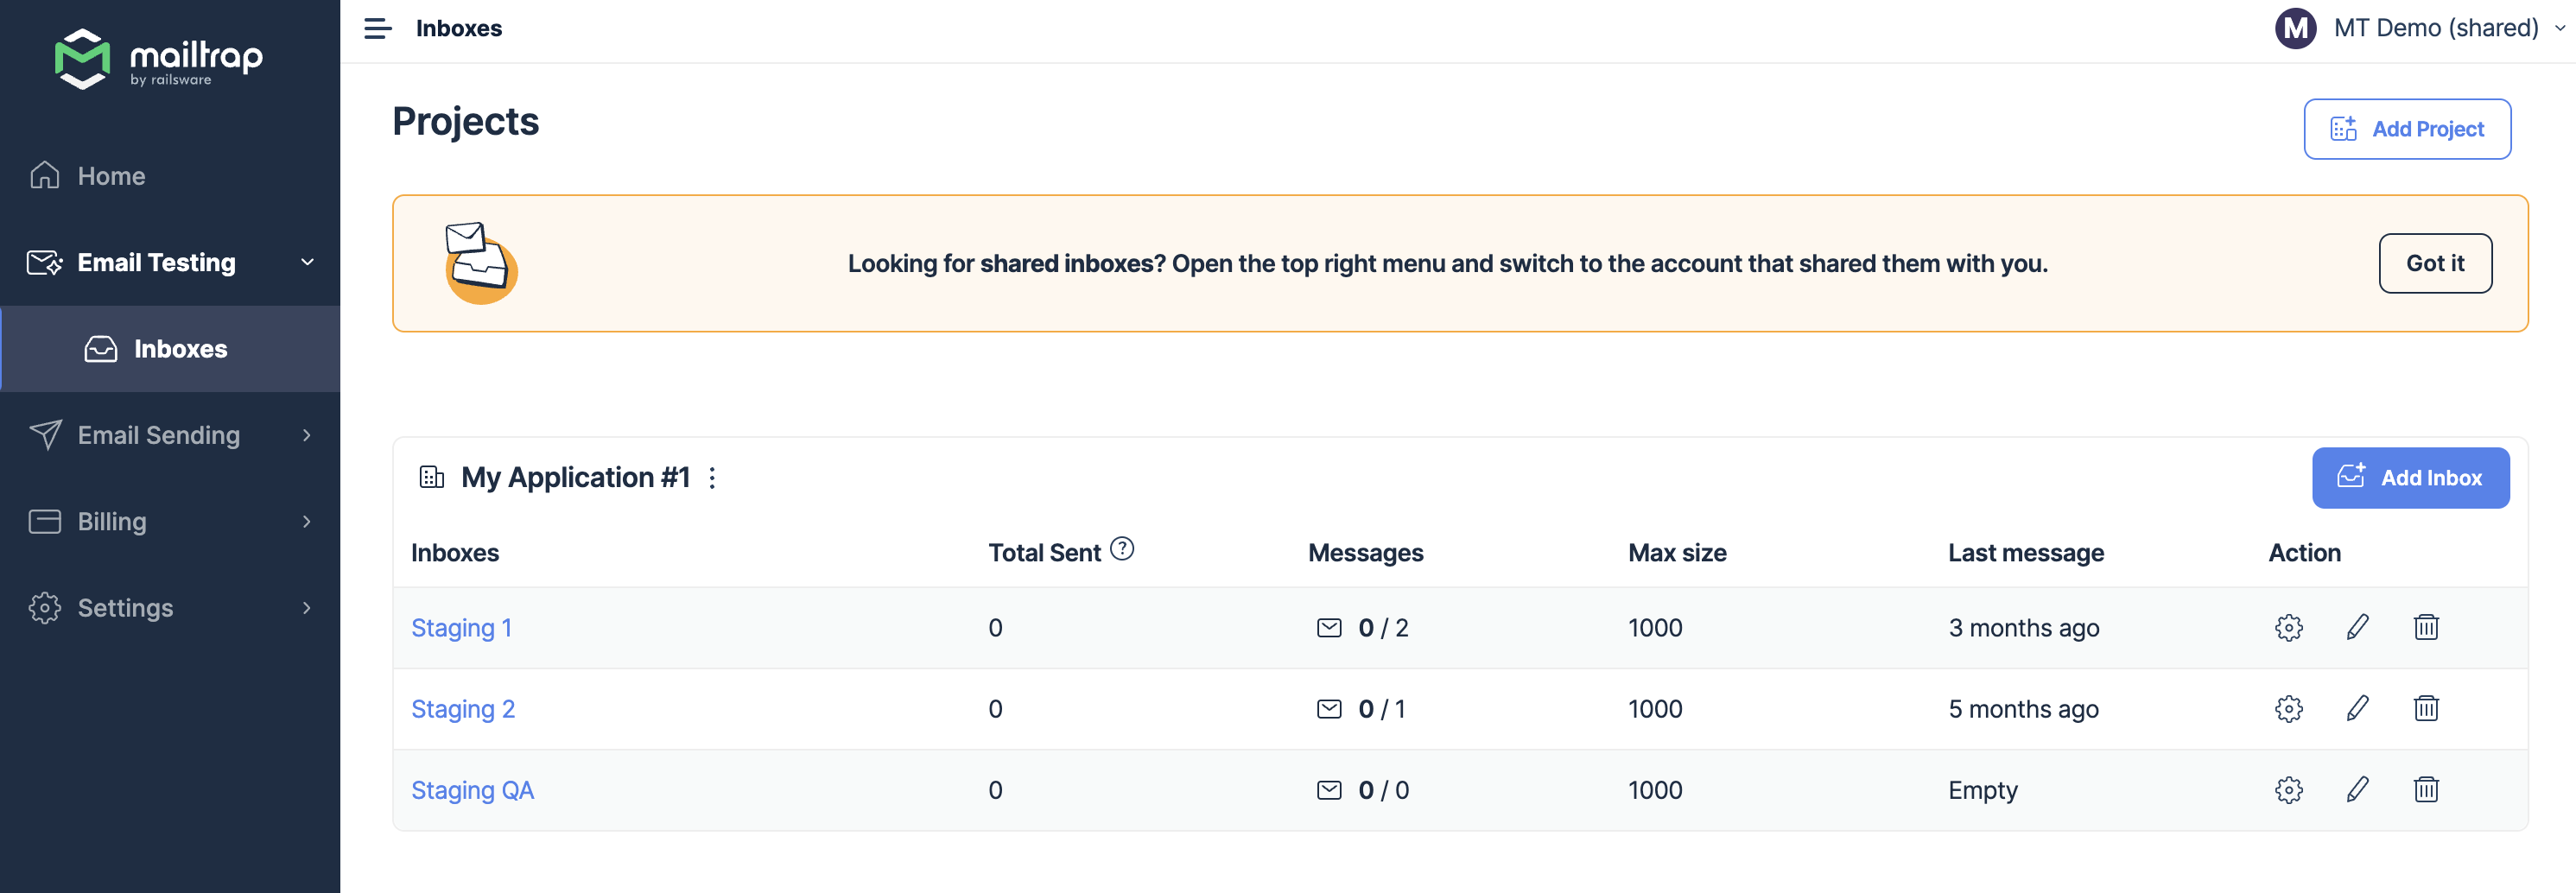
Clicking on Inboxes in the menu bar on the left reveals only the inboxes associated with the account you’re currently using.
If you want to access a different account and inboxes that were shared with you, click on the account switcher in the upper right corner of the window, then select an account from the drop-down menu.
Note that you can be invited to any inbox or project as a user, regardless of the subscription plan you currently use.

 Once you click the Add button, the email invitation will be sent to the specified email address. The recipient should accept the email invitation.